
Home » 2014
Yearly Archives: 2014
Sewing Patterns that Fit- Fifteen Minutes that make a difference
Learning to sew is exciting and fun. To keep the vibe alive, follow these simple steps to make sure that the pattern you are working with fits. There is nothing more frustrating than putting forth a solid effort and getting a poor result in return. All too often, I have heard, in speaking with those who don’t sew, “I can’t sew, I tried back in High School and I was just bad at it.” I feel saddened every time I hear those words – most recently at the Hair Salon, earlier this week. The total time it took me to pin-fit this pattern, was about 15 minutes. Now that it has been transferred to muslin, I will enjoy this pattern for years, and I can make more adjustments to it if I need to based on normal fluctuations in weight. Some sewers choose to transfer to card stock – like the kind used in the Fashion Industry, but these patterns take up more space and cannot be draped or refit to the body. I prefer this method because it has the key advantages of allowing for draping and reshaping as needed, and still has the space saving benefit of getting the pattern back into the envelope.
Here are the steps for a perfect fit of a basic sewing pattern.
1) Cut out your pattern precisely, according to your size. Lay it out on a flat surface and with a warm, dry iron, gently smooth the wrinkles and creases without pulling on the tissue.

2) Once the pattern is smooth, pin the seams together at 5/8″ and make sure to pin any darts closed as shown below (step 3). Use a pen to mark any changes that need to be made but do not change the paper pattern. Working on a flat surface, place the pattern on lightweight muslin and use a ruler to make any changes. If no changes are needed, consider yourself lucky! Most of the human population does not actually fit perfectly into a commercial pattern; skip down to Step 3.
How do you make accurate changes? Here are some tips but feel free to check out my You Tube video on the See It and Sew It Channel if you need more help.
Tips and Tricks:
a) Remember you are working with 1/2 of the whole pattern so add/reduce by 1/2 of the total amount needed. For example shown below, I wanted to add a total of 1 1/2″ (4 cm) to the waist. So as shown, I added 3/8″ (1 cm) to the center front and the center back. Since I will be cutting 2 front pieces and 2 back pieces it works out as: 1 cm x 4 pieces = 4 cm (the amount I wanted) or in American Imperial, 3/8″ x 4 = 1 1/2″.


b) Never put all of the adjustments on one seam. It will make the garment look lopsided. Always add or take away from a pattern in small amounts spread out over multiple seams.
Step 3) Once you have made changes, if needed, cut out the whole pattern from muslin leaving extra fabric around your cutting lines. Do one final pin-fit to make sure that the muslin fits you perfectly. If no further changes are needed, unpin the muslin


4) Using the muslin as your pattern, cut out your fabric with confidence knowing that you will have a perfect fit!
These instructions are for basic patterns, typically labelled as “Easy”. More advanced patterns will need more advanced techniques, including basting, toile and so on. I will get to that subject on a different day. In the meantime, I really hope that this basic tutorial and the accompanying video will help you sew your style.
Style On!
Natalie

Pin Cushion Sewing Jar and Skirted Boxes for Mother’s Day or Easter

Fun for Mother’s Day, Valentine’s Day or anytime you want to show your favorite sewer how sweet she is!

Quick and easy to make, this jar is filled with little delights for your favorite sewer or quilter.
These super cute pin cushion jars are really fun and easy projects. It’s perfect for doing with kids too and makes a nice gift for Mother’s Day, Valentine’s Day or Easter depending on the theme of the fabric.

For this project you will need only a few simple supplies. The jar you are working with, GOOP Craft Adhesive, a few elastic bands – a small one for the cushion and a larger one to use as a ‘clamp’ while the glue is drying, batting (or use cotton balls!), a small box, a 6″-10″ scrap of fabric (depending on the size of the jar) and a bit of trim such as yarn, ribbon or whatever you have around. Stickers
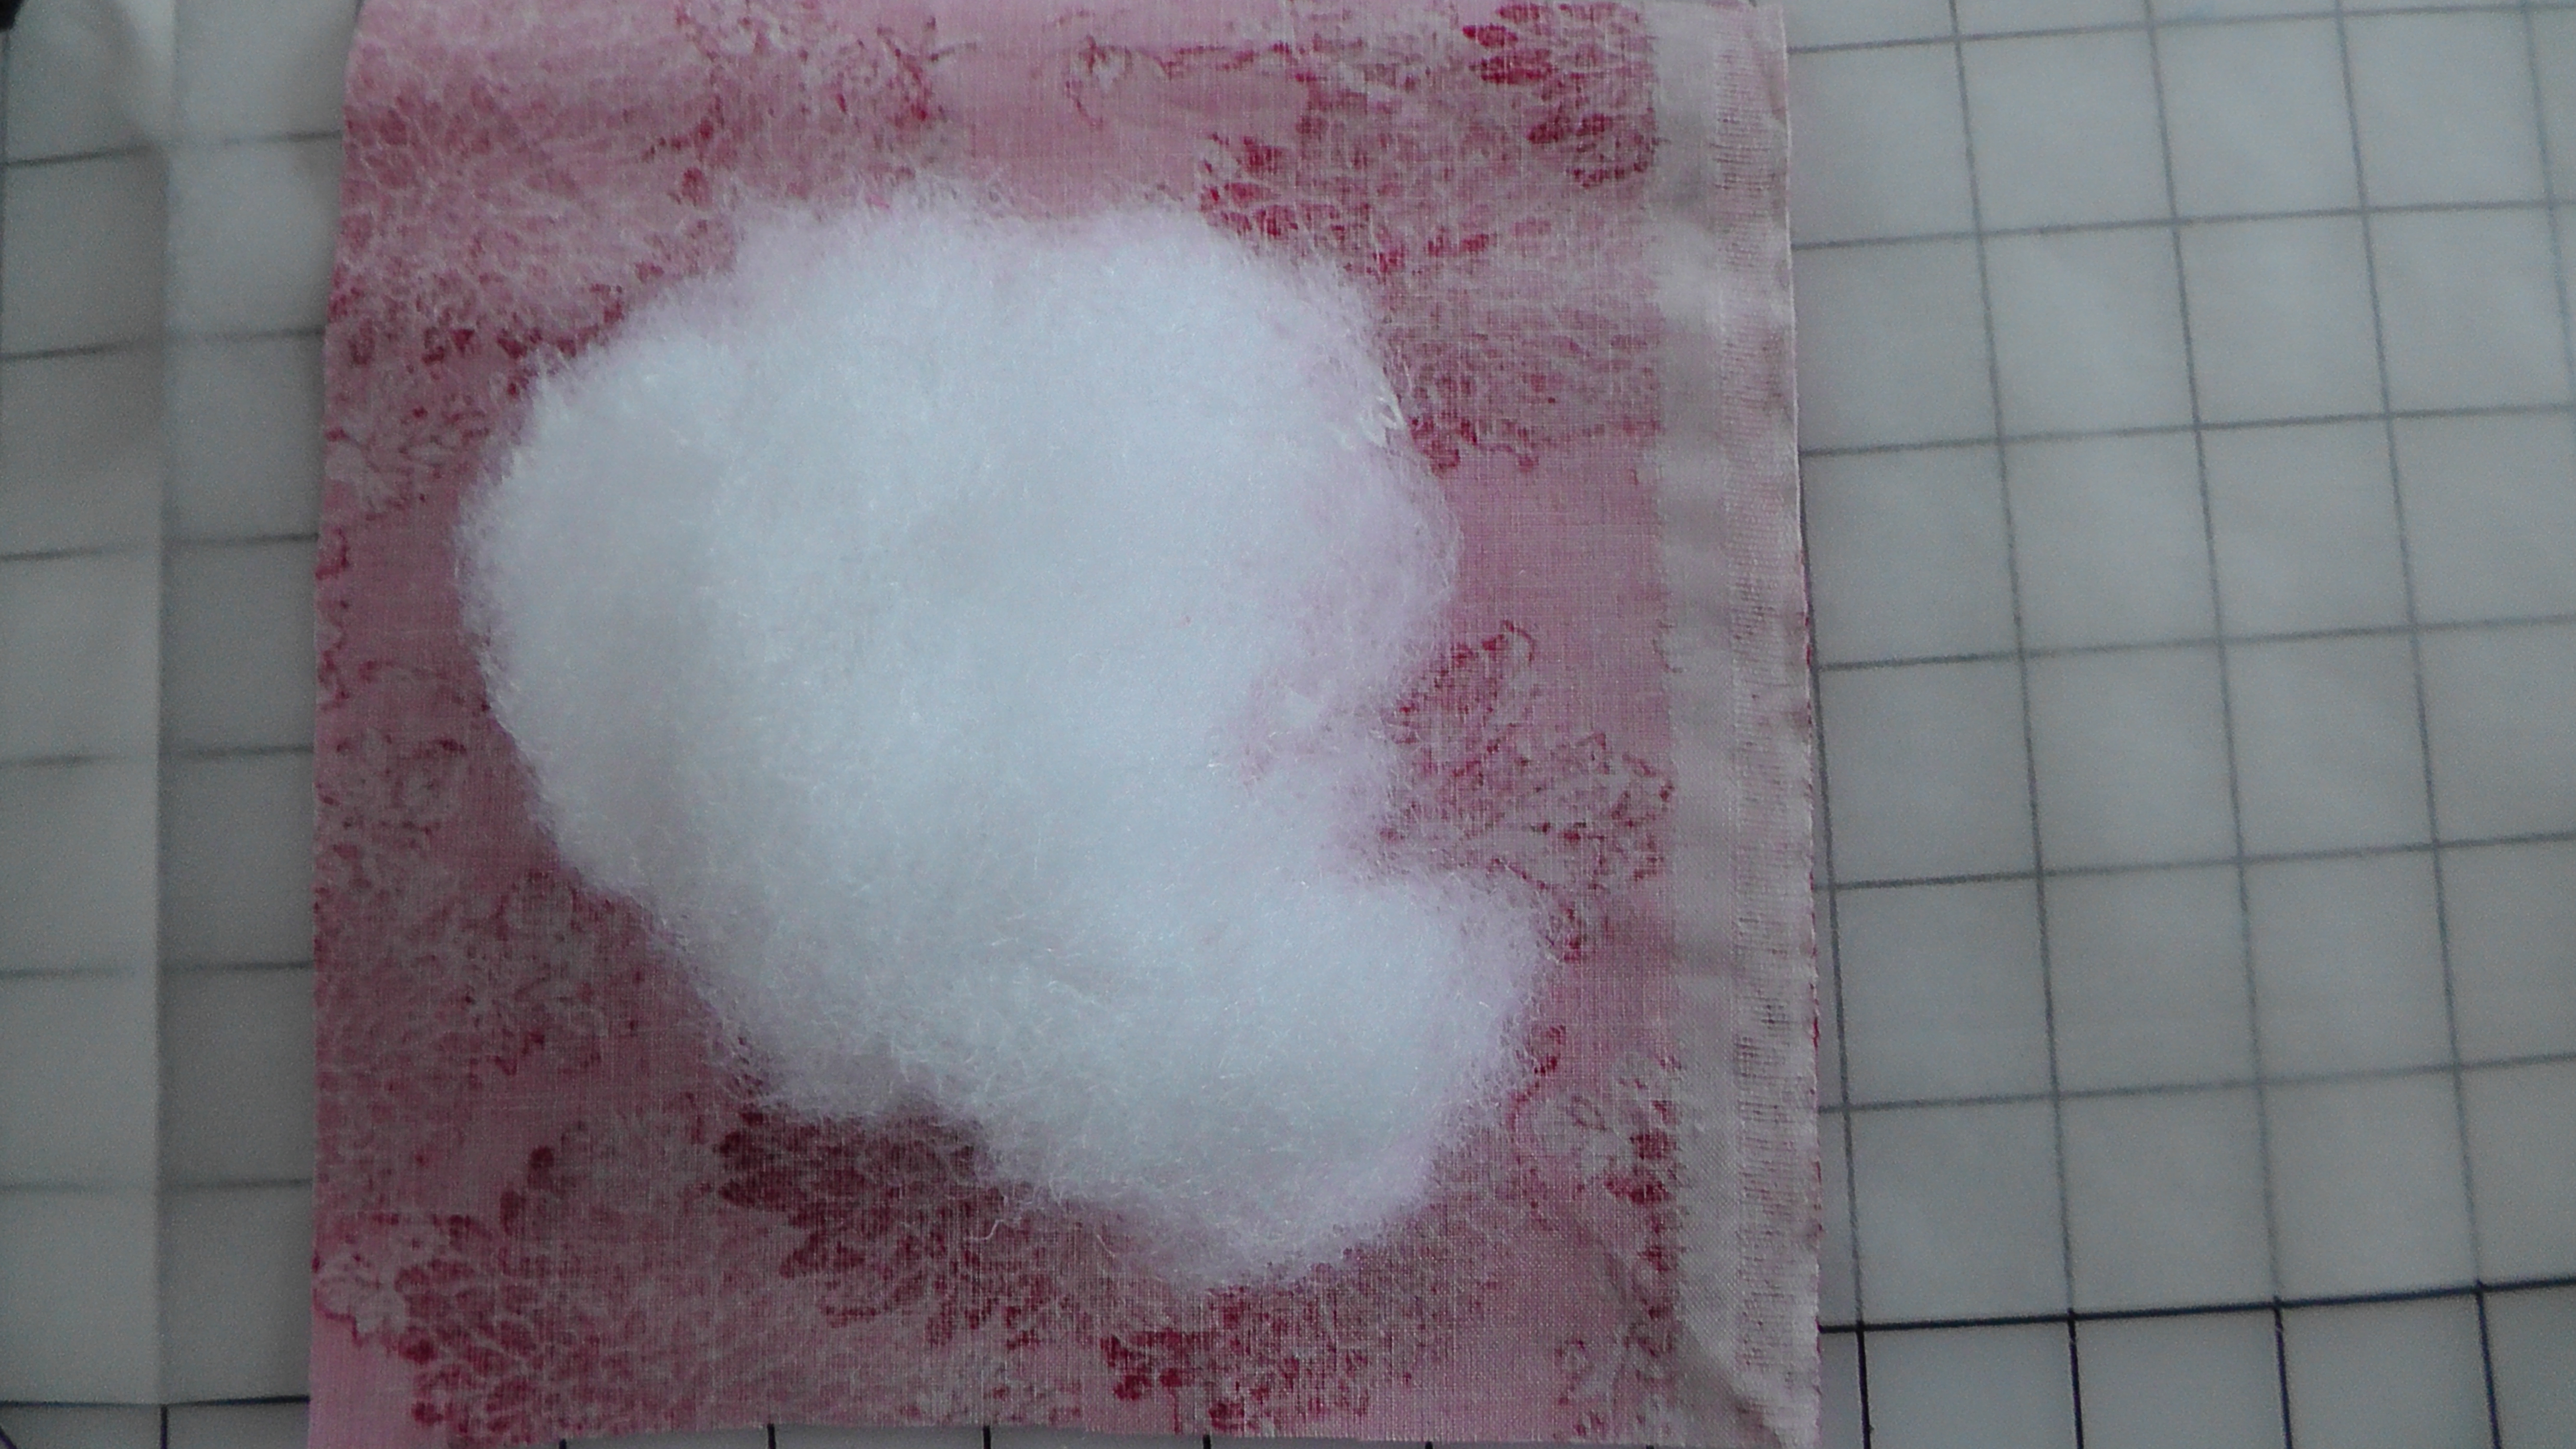
Put a wad of batting in the middle of the fabric square.

Gather up all the edges and secure them with the small elastic band being careful to get all the edges inside. Then trim off the excess fabric ends about 1/2″ up from the elastic band.
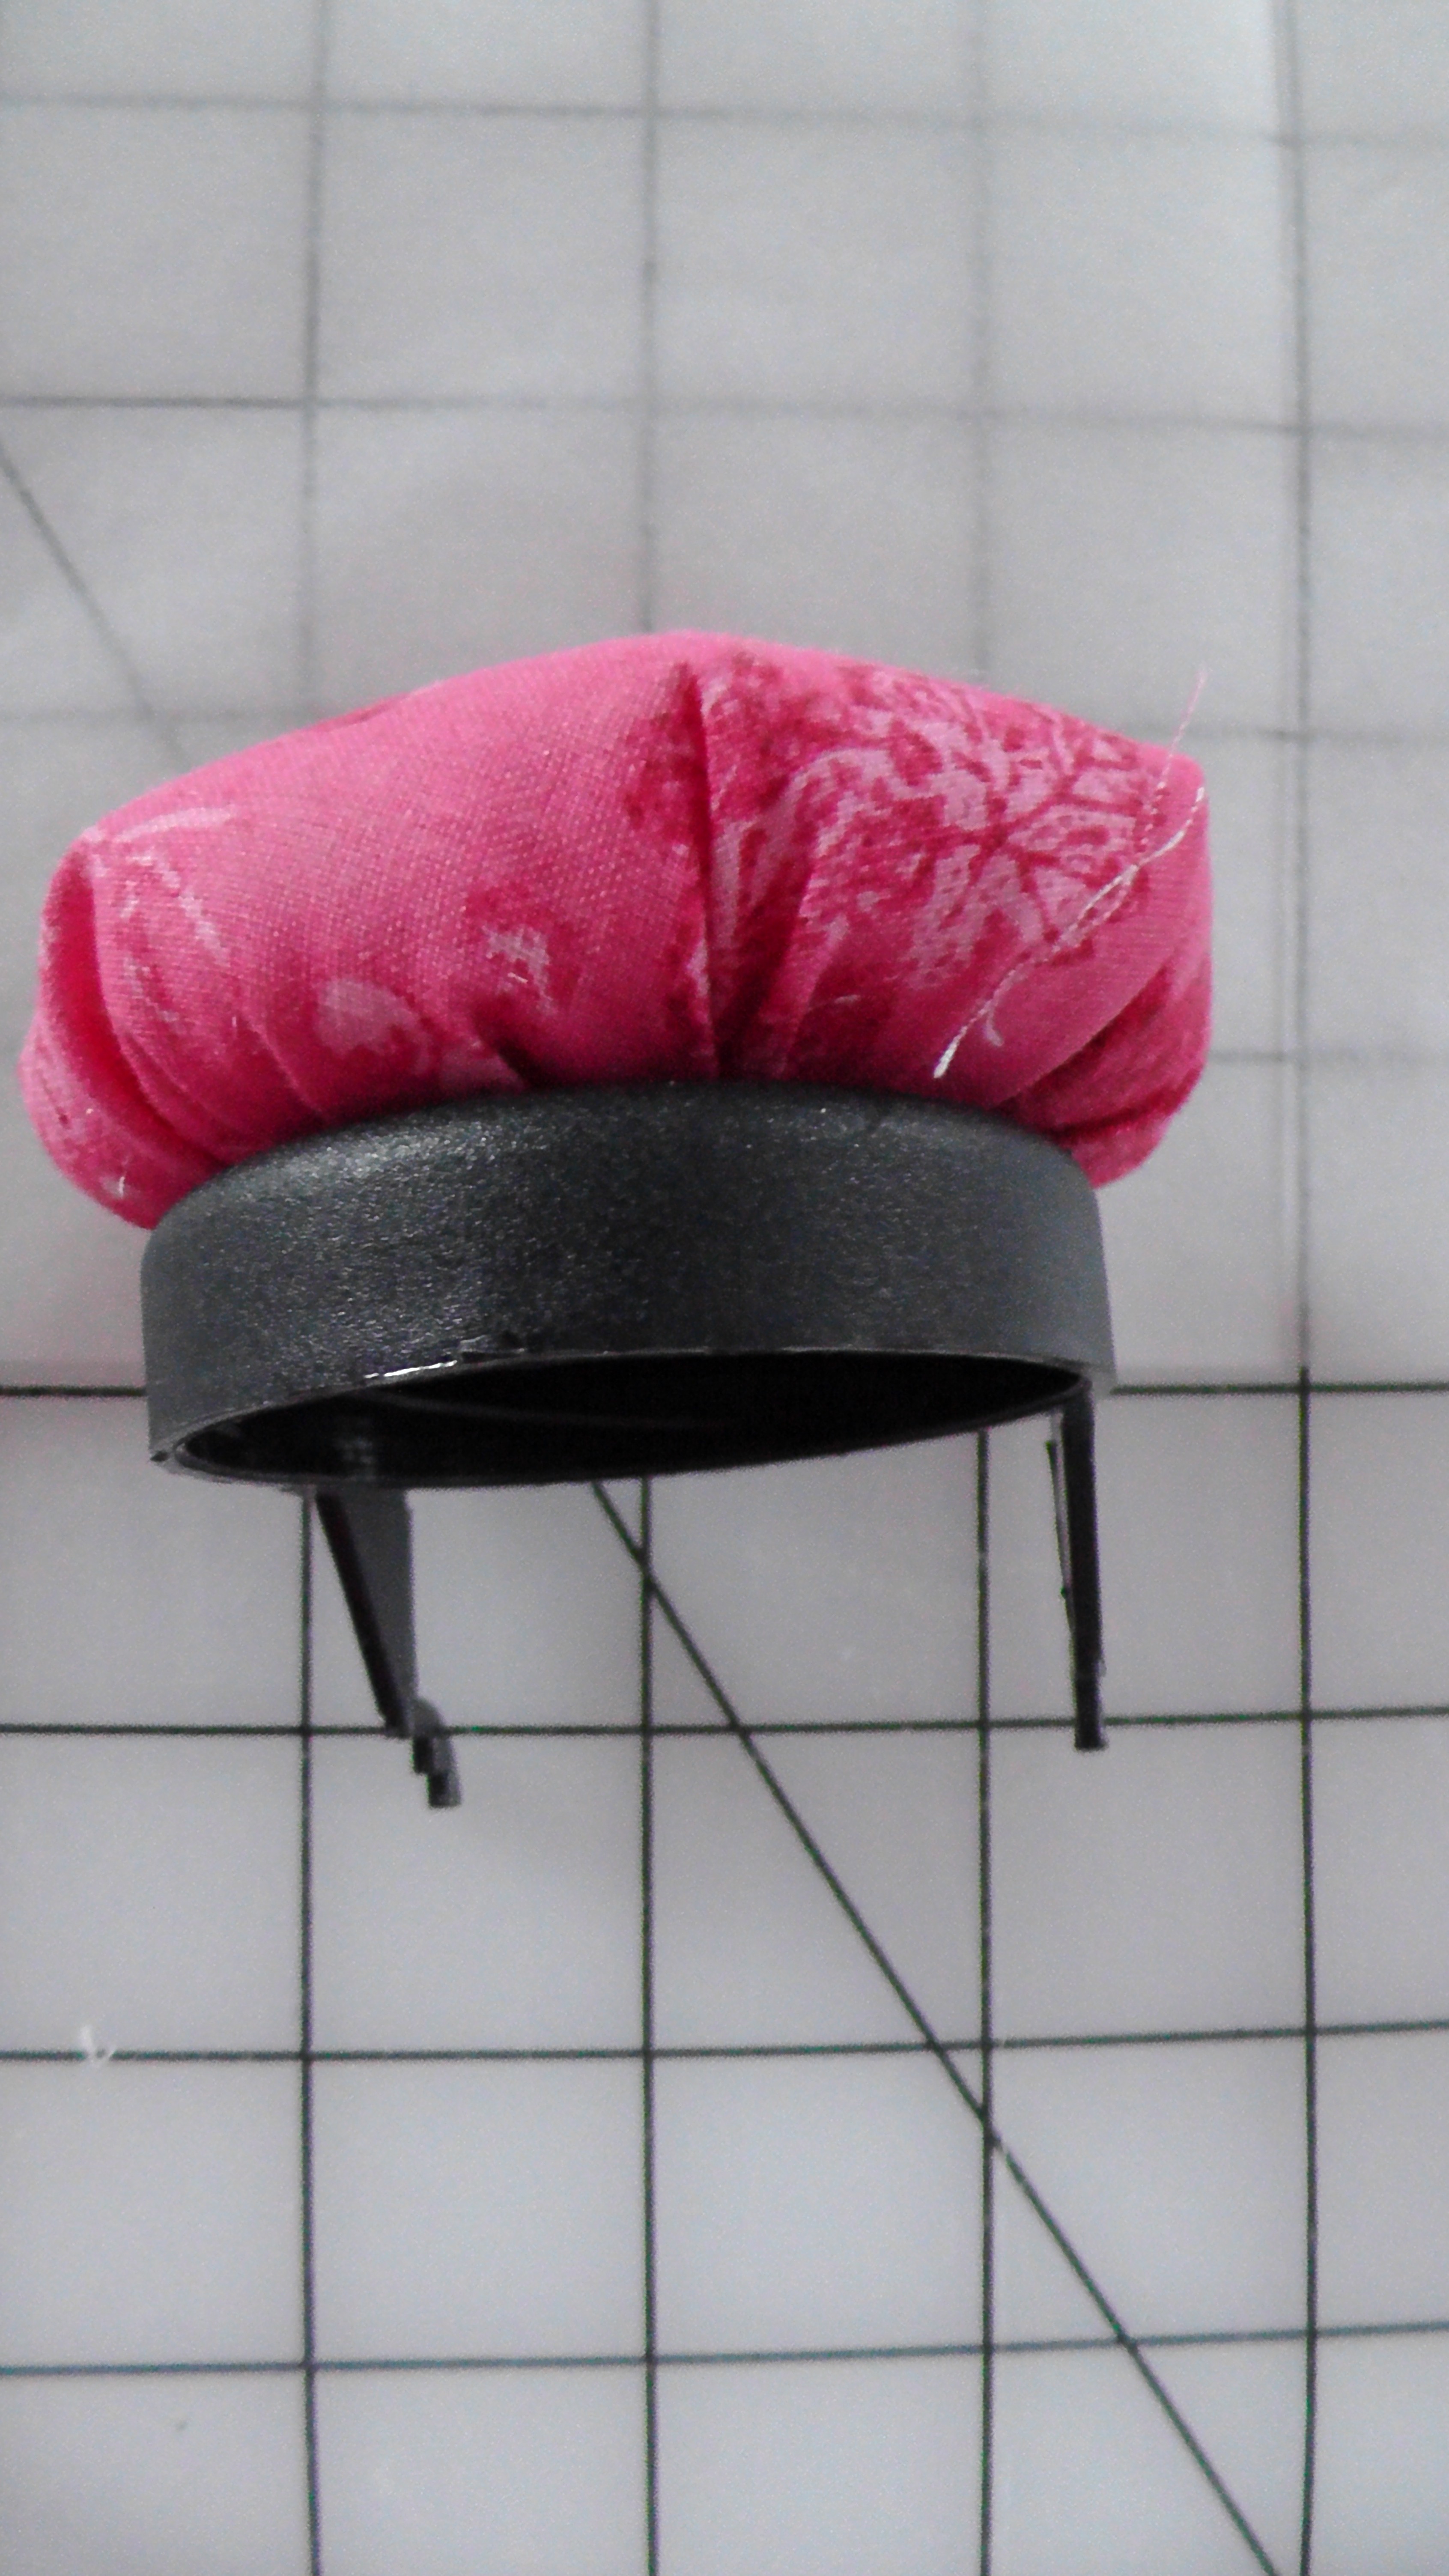
Using the GOOP adhesive, attach the cushion to the lid of the jar and weight it down with something heavy like an old book. Wait for at least 2 hours while the glue dries. In the meantime (gotta keep the kids busy!) carefully

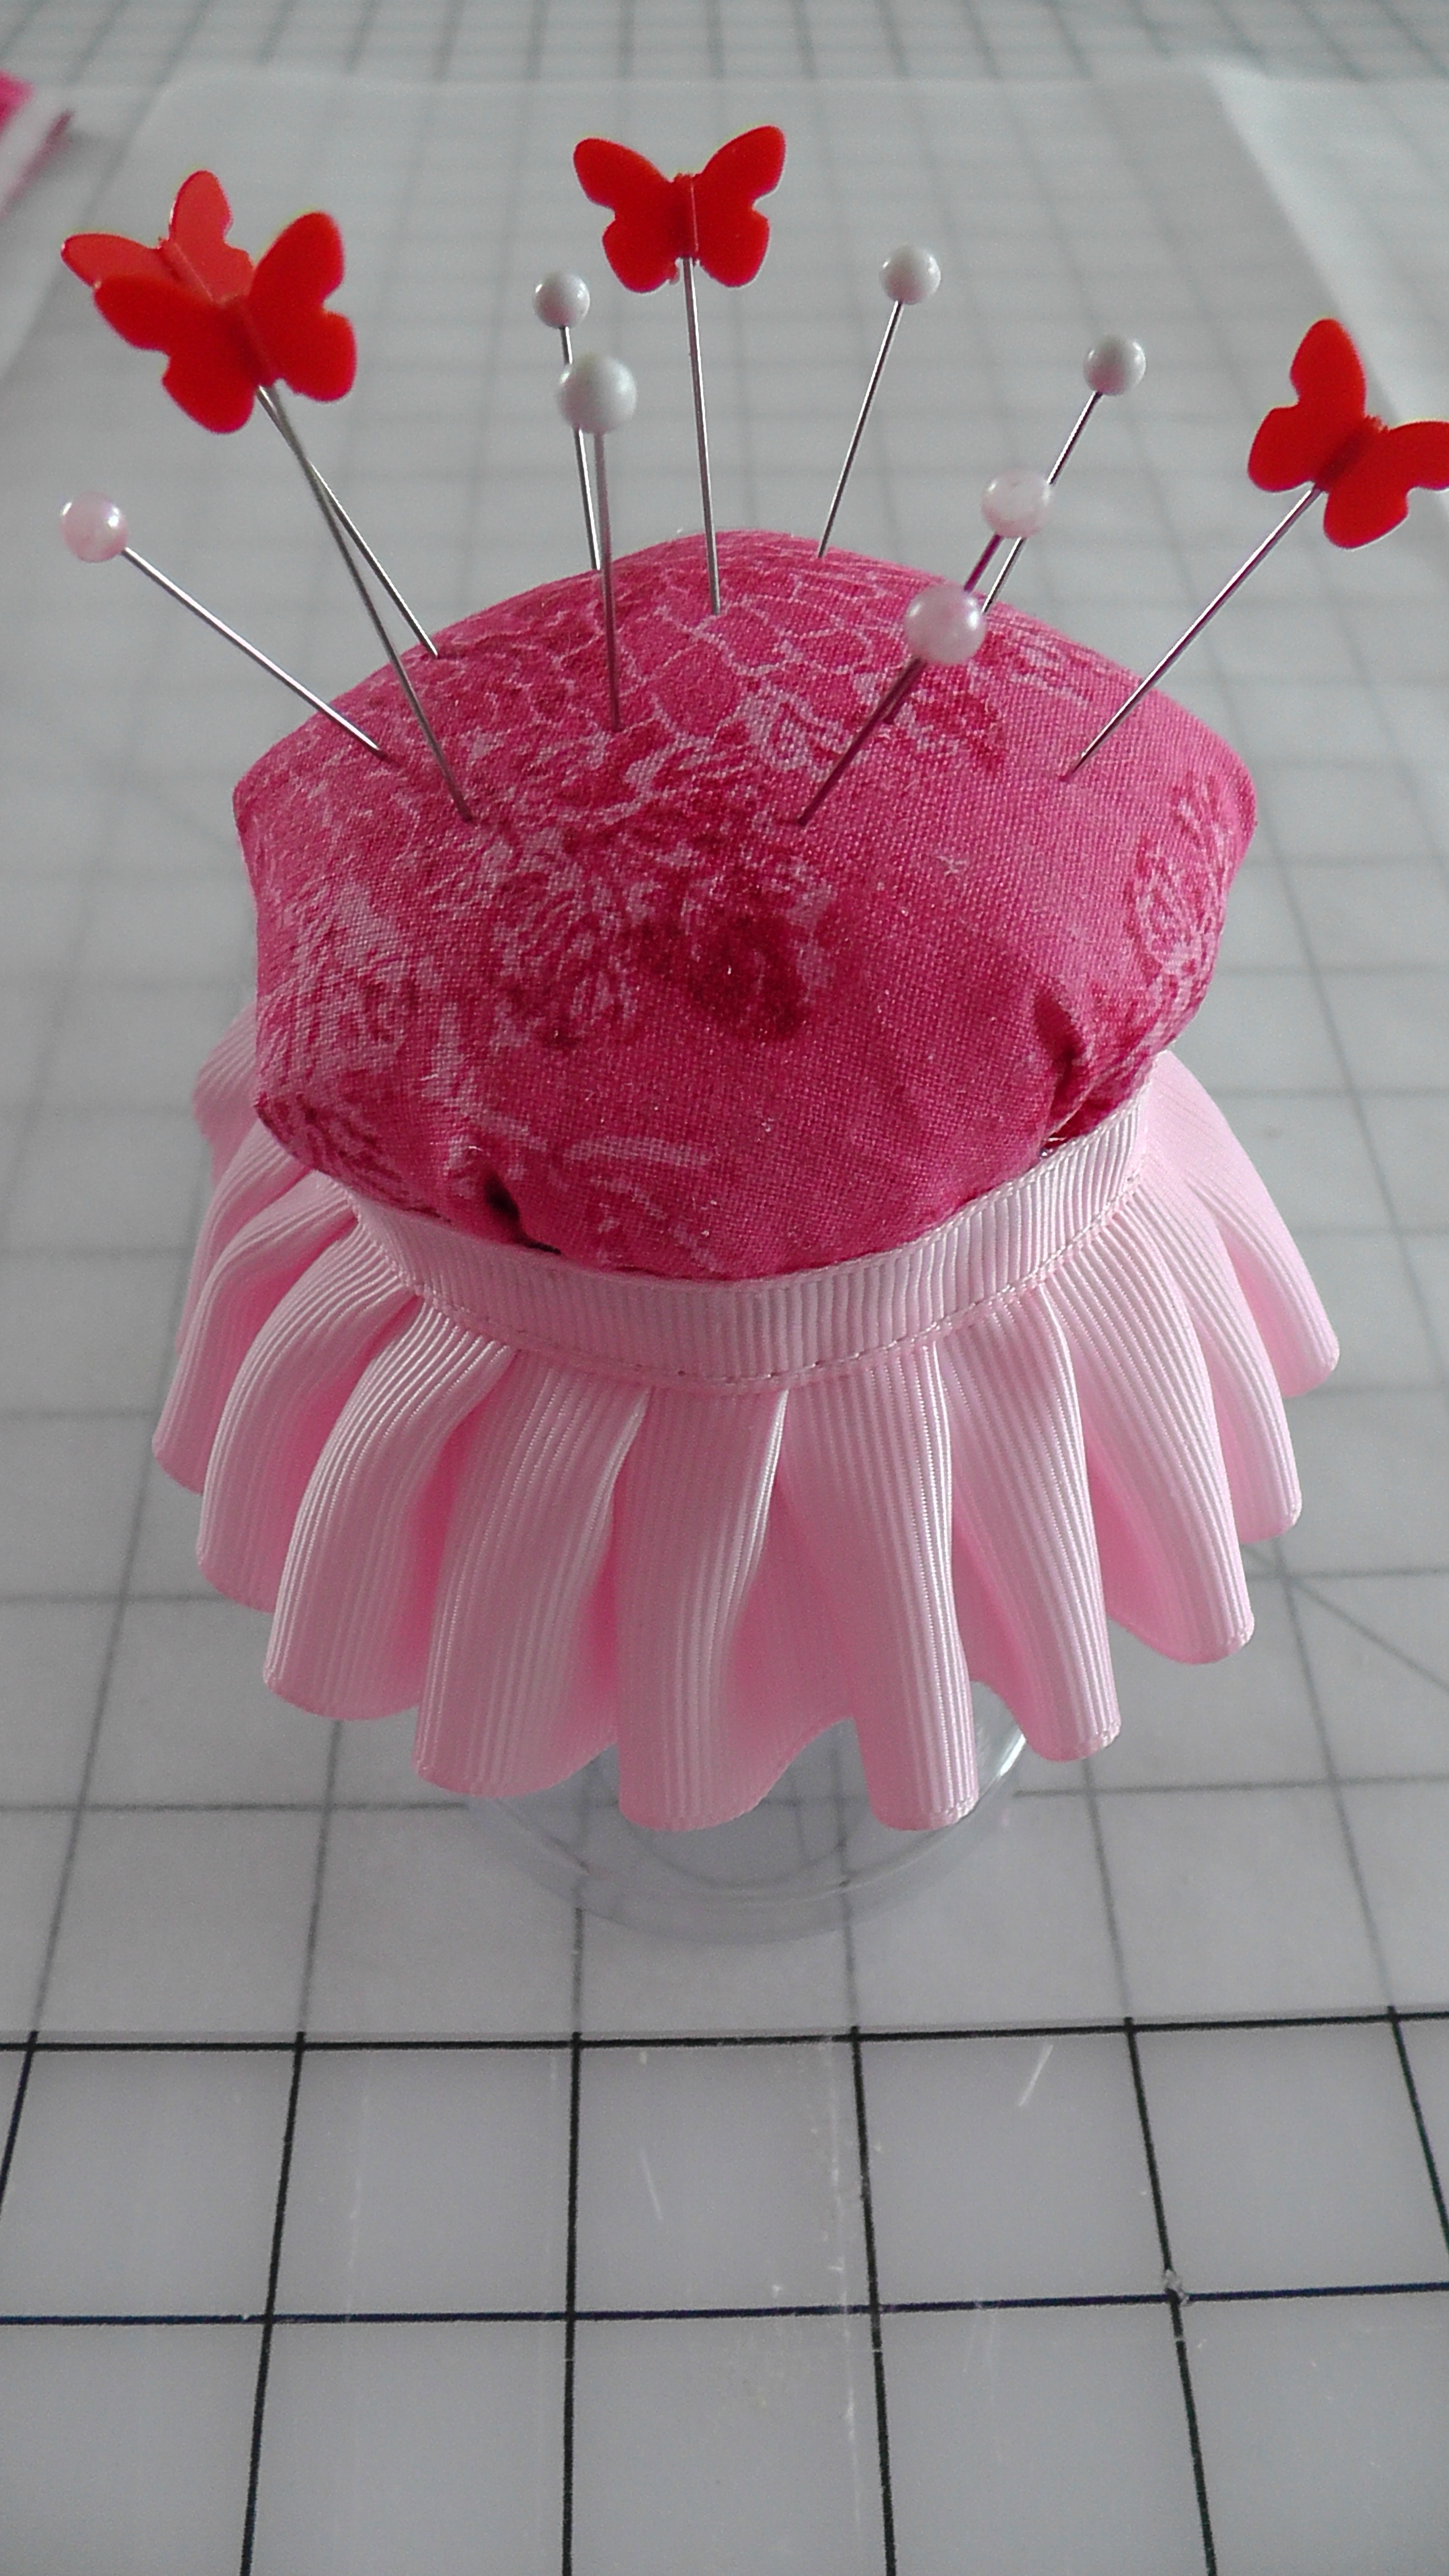
If little ones are involved, the fumes from GOOP might be irritable. The pin cushion on the Easter Jar, shown at the top is made with a canning jar and there is no glue involved. Simply place a wad of poly batting on the flat lid insert. Cover it with your fabric square and pull the ends taut. Slip the ring portion of the lid over the fabric and batting. This will hold everything in place. Trim the excess fabric and you are done in under 5 minutes. Kids ( and the young at heart) can enjoy decorating the outside of the jar with pretty scraps of ribbon, lace or even stickers. Using glue squares protects little ones from harmful fumes and makes it easier for them to decorate the jar. Fill plastic eggs, found for under $1 at big box stores or dollar stores, with notions and treats for a sweet gift!

Fill this fun and easy to make jar with notions, needles and sweets for your favorite sewer or quilter!
Happy Sewing and a blessed Easter Season,
Natalie
Die schnellste Tunika, die wo gibt’s
Klein’s tutorial is written in German but the pictures speak a thousand words. Way cool. I love the choice of colors and the easy breezy fit of the tunic.
Tower of Tables
I am writing reviews for a series of sewing machines in the under $250 and under $500 categories in aid of equipping my newly expanded studio. I am testing out the machines, at my own expense, and shipping back the ones I decide not to keep. One of the categories that I am measuring is the accessories that come with the machine or are available for purchase. To make it easy to understand how that all stacks up, I literally stacked the extension tables to see how they rated. Here are the results:


The Juki HZL series table is at the bottom and is the largest measuring a generous 47 cm x 28 cm.
BRAND____LINE____________LENGTH__WIDTH__LEGS
JUKI________HZL____________51________30._______5
BROTHER__PRW210/420______46.________27.5._____4
BROTHER__CX155/Designio____39________25_______3
Singer_____9960/9970/9985. ____39.5______25_______4
Brother____CS6000i/CE7070____39________22_______3
The underside construction and the density of the plastic use plays a big role in the sturdiness and weight of the table. The Brother PRW 210/420 table features a solid back with a groove to hold the included knee lifter while the other tables have a grid system. This is particularly useful for the Juki and Singer which have a gentle arch allowing fabric to slide smoothly over the surface and prevent drag on heavy projects such as quilts and home decor items.

I am truthfully in a quandary. I cannot decide between the larger size and slick, glossy surface of the Juki, which I have come to love so much, and the heavier, practical design of the Brother PRW which allows me to keep track of the knee lifter.
I love both machines and was really sorry to have to return the Brother when it ceased to work (I am anxiously awaiting a replacement) so I guess I will just leave it as a tie. The Juki is my travel mate and the Brother is for the DH/students/guests to stitch on, each has its place.
Dryer sheets as stabilizer
I am in the process of reviewing a number of sewing machines and while testing out the decorative and monogram stitches I found myself using a great tip from Sewing Pattern Review for using dryer sheets as stabilizer. For those of us who find themselves stuck every now and again, wanting to do a bit of embroidery or decorative stitching and are completely out of stabilizer this tip works really well!
I used it with the Brother Laura Ashley and the Singer 9970 too. Here are some of the results
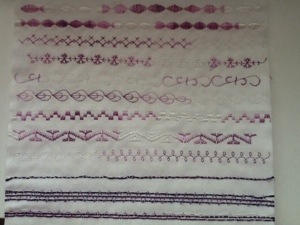
I thought this was such a great tip that I wanted to pass it along. Sewing Pattern Review has a wonderful collaboration of sewers and is one of my favorite places to get information on sewing machines.
DIY Circular Sewing Attachment

Happy New Year! Over the Holidays I got busy and reviewed a whopping 8 (!) sewing machines. I will post the results on our new main website at http://www.seeitandsewit.com once it is up and running (hopefully over the next two weeks). In the meanwhile, as I was messing about, I decided to push the limits of the Brother Laura Ashley CX-155, to see how many of the great features, found on it’s bigger (read: much more expensive) cousins; NX2000, NX5000 Isadore and the NX800, I could emulate. One of the features that I really love about the Laura Ashley line is the ability to create perfect circular sewing. So, I made myself a little circular sewing attachment and gave it a whirl. Here is how I made it, and the results. Happy Sewing!
For this project you will need: a thin flat ruler, sticky Velcro, a fine tip marker, a utility knife and cutting mat, some 1″ tape (I used the double fold kind for strength and because the package I had happened to be pink!) the extension table for your machine and a glossy plastic accordion file folder. It needs to be made of heavy plastic so it can hold at the fulcrum point and glossy so the fabric does not drag on the surface.


You will also need a good pair of scissors, needle nose pliers, an awl or push pin (both pictured) and a commemorative pin that is completely flat or a heavy duty office tack such as those pictured below. I found these on Etsy.com. If the shaft on the pin is long, an earring backing, placed between the pin keeper and the fabric surface, can help keep the fabric from shifting. I just used one from an old earring that had lost it’s mate.

Step 1: Tear or cut the plastic file folder open. Lay it flat and place your extension table upside down on it. Trace around the outer perimeter of your extension table and cut the plastic to shape. This forms the Attachment Base.

Step 2: Attach your extension table to your machine and place the Attachment Base on it, taking note of the location of the two small sew holes on either side if the presser foot. Carefully line up the edges. Lower the presser foot and use your needle to poke a hole in the plastic. Trace around the presser foot. Then, using the push pin poke two more holes to indicate where the two screw hole are. This forms the outmost limit of the opening to be cut.

Step 3: Cut a rectangle opening for the presser foot and feed dogs. Use the two push pin hole to make sure that the opening is slightly larger than the presser foot are but not so large as to cause drag on your fabric.

Step 4: Line your ruler up with center of the feed dog opening and mark a straight line with hash marks every 1/2″ beginning at 2″ away from the center of your opening. The first photo was a bit blurry so I retook it – it’s a little off with the ruler placement (sorry!:)) Use your awl or push pin to poke holes at each of the half inch hash marks. TIP: If you are using a push pin and the plastic is too thick, try to use needle nose pliers to hold the push pin and gently heat the tip with your iron. Then, use the warmed push pin to make the hole. This will melt the plastic, hopefully preventing any cracking.


Step 5: Place the Attachment Base upside down on a flat surface. Cut 4 pieces of Sticky Velcro (both parts) I made my pieces about 1 1/4″ long (pictured below) but wish that I had made it longer. After testing this prototype, I found that 2 1/2″ is a lot better because it allows me to use the Circular Sewing Attachment with more that one machine and also accommodates any stretching by the bias tape.

Step 6: Reinforce the Velcro with stitching.

That’s it! You’re done! Just insert the commemorative pin and cap or your push pin/earring backing combo into any one of the holes and strap the attachment to your machine. You will need to lift your machine so the right strap can pass underneath. The weight of your machine adds stability to the Circular Sewing Attachment. After that, just add your fabric. Have fun!

If you would to see a step by step tutorial showing how I made the pillow shown in the photo above, feel free to leave me a comment and I will post the details.
Happy Sewing! Natalie
